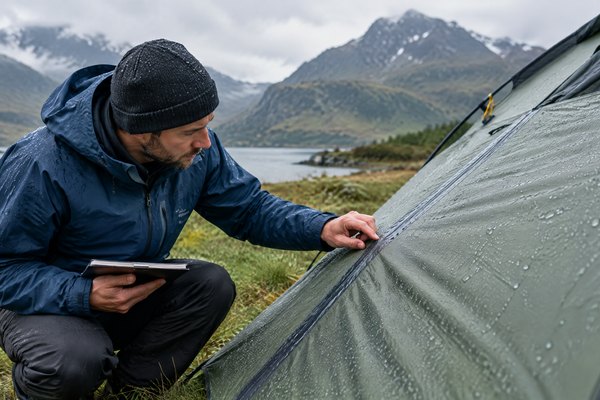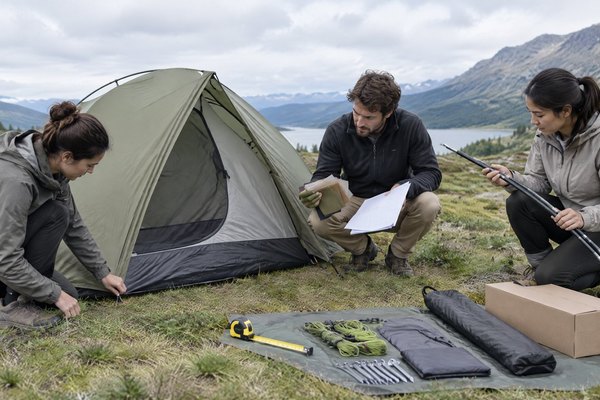
A useful sourcing decision starts with a written requirement that can be challenged, sampled, inspected, and approved.
How Do You Choose a Camping Tent Supplier for Private Label Projects?
Choosing a camping tent supplier for a private-label programme is not simply a price comparison. It is a decision about whether a supplier can turn a market-specific product brief into repeatable, documented output: suitable fabrics and coatings, an appropriate support system, sound seam and floor construction, usable instructions, retail-ready packaging, and verifiable inspection results.
Tents make weak specifications visible. An unclear flysheet-coverage definition, a water-resistance result that applies only to flat fabric, a pole substitution, or a carton that cannot protect a compressed product can all become customer-facing failures. Buyers selling into the United States and Europe also need to account for destination-market requirements. The U.S. Consumer Product Safety Commission identifies ASTM F3431-21 as a voluntary standard on recreational camping-tent flammability and related warning labels, while the European Union’s textile-label guidance explicitly includes camping tents. [1] [2]
This is operational B2B sourcing guidance, not legal advice. Confirm current requirements, test methods, claims, and import documentation for each destination market with qualified advisers and the responsible parties in the supply chain.
Quick Answer
Choose a camping tent supplier through a controlled sequence, not a catalogue comparison. First, issue a written brief covering user, climate, capacity, intended use, claims, markets, packaging, and acceptance criteria. Second, ask the supplier to translate it into a bill of materials (BOM), technical pack, risk register, and sample plan. Third, validate the actual tent—not just fabric swatches—through sample review, relevant testing, observed setup, and a pre-shipment inspection plan.
The key questions are whether the supplier can separate fixed requirements from proposals, link every performance claim to evidence, control specification changes, and agree to a product-specific inspection checklist. A verbal “yes” has value only when supported by controlled documents, approved samples, and records.
1. Frame the Buyer Context and the Risks
Private label means the brand owns the market promise even when an external manufacturer makes the tent. Supplier selection is therefore a risk-allocation exercise. The tent must perform as described in its expected environment, be pitchable with the supplied instructions, arrive in saleable condition, and remain traceable if an issue occurs.
Begin with the product’s commercial role. A value camping tent, technical backpacking tent, family tunnel tent, festival shelter, and inflatable cabin tent have different priorities. A backpacking buyer may emphasise packed volume, support geometry, floor abrasion, and repairability. A family-tent buyer may prioritise internal space, vestibule access, ventilation, weather management, and intuitive pitching. Retailers may additionally require barcode placement, master-carton limits, pallet patterns, and multilingual copy.
State the intended use in plain language. Intended use is how the brand expects the customer to use the product. Foreseeable misuse is a plausible but unintended use that design or instructions may need to address. Rather than calling every tent “all-weather,” describe the expected user, occupancy, trip length, season positioning, weather exposure, ground conditions, and conditions outside the product’s scope. This wording anchors construction, safety information, and marketing review.
Distinguish OEM from ODM early. OEM (original equipment manufacturing) generally means manufacture to the buyer’s defined design and specification. ODM (original design manufacturing) generally starts with a supplier-developed platform that a buyer adapts. An ODM platform can shorten development when its performance is known; an OEM route can give greater control over a genuinely differentiated design. In either model, agree who controls drawings, bespoke components, artwork, revisions, and the approved golden sample.
| Decision area | Buyer must define | Supplier should return | Risk if unresolved |
|---|---|---|---|
| User and environment | Customer, capacity, season, terrain, weather exposure | Recommended architecture and stated limitations | A tent that meets a generic specification but misses user needs |
| Product architecture | Freestanding, tunnel, cabin, pop-up, trekking-pole, or inflatable concept | Frame layout, component list, pitch sequence, open technical questions | Unstable geometry or a difficult setup experience |
| Markets and presentation | Countries of sale, brand assets, packaging, languages, channel | Labelling, instruction, testing, and documentation questions | Late redesign or market-entry delay |
| Quality acceptance | Critical defects, functional checks, sampling and reporting method | Control plan and inspection checklist | Disagreement over acceptable output |
2. Convert the Brief Into a Technical Pack
A technical pack is the controlled product information used to develop and make an item. For a tent, it should normally include a dimensioned layout, component list, material specifications, colour standards, construction callouts, artwork, labels, packaging details, user-information outline, test plan, and revision history.
Make dimensions measurable. “Spacious for four” is a selling phrase, not a manufacturing criterion. Specify nominal floor length and width, peak height, vestibule dimensions, packed dimensions, and permitted tolerances. State whether capacity assumes standard sleeping mats and whether the footprint, guylines, stakes, repair kit, pump, or other accessories are included.
Request a BOM that separately identifies flysheet, inner, floor, mesh, webbing, zips, thread, buckles, poles or air-beam components, stakes, guylines, carry bag, labels, carton, and protective packing. For each material, list the supplier material code, fibre content or composition, construction, colour, finish, and relevant weight or thickness. This prevents an imprecise description such as “polyester tent” from concealing important differences.
Create a claim register alongside the technical pack. Pair every consumer-facing claim with its evidence. “Water-repellent exterior” needs a defined finish and assessment. “Blackout bedroom” needs a stated acceptance appearance under stated conditions. “Easy setup” needs an observed user protocol. “Recycled content” needs component-level substantiation. Avoid broad statements such as “waterproof,” “windproof,” “UV resistant,” or “fireproof” unless the wording, evidence, and limits have been reviewed for the relevant project.
A helpful first brief might describe a two-person, three-season tent with two doors, two vestibules, a freestanding inner, separate fly, low packed-volume objective, and field-replaceable pole set. It should ask the supplier to propose materials and coatings, map sealed seams, identify the basis for relevant claims, submit a pitched sample, and draft instructions that a first-time user can follow. It should not pre-select every denier, coating, or pole alloy merely because another product uses it. Invite the supplier to flag incompatible requirements before sampling.
3. Ask Specific Fabric and Coating Questions
Tent textiles perform different jobs. The flysheet manages external exposure; the inner manages comfort, privacy, and ventilation; the floor manages standing water, abrasion, puncture, and soiling. Fibre name alone cannot predict how the finished tent will perform.
Ask for fabric construction, yarn type, weave, nominal mass per unit area, finish, coating or laminate, colour process, and any reinforcing grid or ripstop structure. Clarify whether a stated weight refers to greige, finished, coated, or cut-component fabric. These descriptions are not interchangeable.
Separate water repellency from water resistance. Water repellency describes how readily water beads and rolls off a surface. Water resistance concerns penetration under a stated method. A coating may resist penetration while the exterior surface wets out; a surface finish may improve beading without proving that a stitched tent will resist rain. Ask which exact material and construction the result represents, after what conditioning, using which method, and how seams and product geometry will be assessed.
Coating questions require equal care. Polyurethane, silicone, acrylic, and other systems can affect water resistance, hand feel, seam-tape compatibility, mass, and ageing. Confirm the coated side, coating specification where relevant, finishing controls, and whether the seam-sealing approach is compatible with final fabric. Ask what happens if the base fabric, coating supplier, or formulation changes after sample approval. ISO 5912:2020 covers requirements for safety, performance, and fitness for use of camping tents; it can inform technical discussions, but it does not replace a destination-market assessment. [3]
| Fabric or coating question | Why it matters | Evidence to request |
|---|---|---|
| What is the full flysheet construction? | Fibre alone does not define weight, tear behaviour, or coating compatibility | BOM entry, technical data sheet, retained swatch |
| Which side is coated or treated? | It affects handling, appearance, and seam treatment | Supplier specification and signed sample |
| What does the stated water result cover? | Flat-fabric results do not automatically represent seams or finished tents | Test method, conditioning, sample identity, result, and date |
| How are UV or colour claims controlled? | Exposure conditions and pass criteria must match the claim | Agreed wording and relevant protocol if required |
| Is fabric change-controlled? | A substitution can alter strength, colour, coating, and seams | Approved material code, change-notification rule, lot records |
EU guidance says textile products made of at least 80% textile fibres, including camping tents, must show fibre composition when marketed in the EU. Labels should be attached, legible, and translated for the countries where consumers can buy the product. [2] In the U.S., FTC guidance says most covered textile and wool products require fibre content, country of origin, and the identity of the manufacturer or another responsible business. [4] Confirm applicability to the final tent configuration and channel, then ensure the supplier can provide verified composition data and a controlled label layout.
4. Compare Poles, Air Beams, and the Load Path
The support system is a user-experience and performance decision, not an accessory choice. Poles create a defined structure with rigid or semi-rigid members. Air beams use inflatable tubes. The appropriate option depends on tent geometry, expected conditions, user capability, packed-size objective, repair strategy, and the setup promise the brand intends to make.
For a pole tent, request material, diameter range, segment lengths, ferrule or joint type, elastic-cord specification, tip construction, pre-bend information, finish, and colour-coding plan. The supplier should show how pole geometry relates to the fabric pattern. A pole that passes through a sleeve but over-stresses a hub, grommet, or crossing point is not validated by a quick showroom pitch.
For air beams, ask for tube construction, beam diameter, nominal operating pressure, valve type, pump interface, pressure-relief design if applicable, repair-kit contents, isolation between beams, and the user response to pressure loss. Ask for the method used to assess pressure retention and the ambient conditions during testing. Do not use “puncture proof” as an unqualified claim; specify and validate the repair and containment strategy instead.
Evaluate the load path: the route through which wind and user forces transfer from canopy to poles or beams, connection points, guylines, stakes, and ground. A premium pole will not offset weak webbing, unsuitable stakes, poorly aligned guylines, or instructions that omit tensioning steps. Request a pitch diagram that shows assembly order, component routing, guyline points, stake locations, and steps that prevent a user from forcing a connection.
For an installation-preparation review, pitch a family tunnel-tent sample on level ground using retail-pack contents only. Record the people needed, tension points, interior dimensions, door and vent operation, rainfly closure, and whether the tent repacks into its supplied bag. Note confusing steps, excess force, inaccessible zips, and components that will not pack correctly.
Mid-project specification review
Once architecture, materials, support system, and labels are defined, request a formal specification review through CampLume’s site RFQ form or email info@camplume.com. Include destination markets, use case, drawings or references, desired claims, proposed packaging, and retailer testing requirements. The aim is to identify assumptions, open technical questions, and documentation needed for a project-specific quotation and development path—not to obtain a blanket performance promise.
5. Review Seams, Floors, Ventilation, and Hardware
Many weather-entry, abrasion, and setup problems occur at interfaces: seams, corners, zips, pole sleeves, guy points, floor-to-wall joints, and vents. Review these areas before debating small cosmetic differences.
A seam allowance is the material width captured within a seam. A seam seal is a material or treatment used to reduce water entry through needle holes or joined panels. Ask the supplier to map each seam by function: structural, weather-exposed, internal, floor, stress-bearing, or decorative. Then ask which seams are sealed, by what method, and how application is checked on finished goods.
Floor construction needs its own review. Clarify the floor fabric construction, coating or laminate, pattern shape, corner reinforcement, wall height, and relationship to any optional footprint. A bathtub floor extends the floor panel up the sidewalls to reduce low-level seams near the ground. It does not, on its own, guarantee that water cannot enter; outcome depends on design, pitching, seam treatment, ground conditions, and use.
Map pole ends, hubs, clips, webbing anchors, zip ends, stake loops, guyline anchors, carry handles, pump connections, and floor corners. For each, request the reinforcement description and production check. Verify zips, sliders, buckles, adjusters, cord locks, hooks, clips, and grommets on an assembled tent, not only as loose parts.
Ventilation is construction rather than copywriting. Map intake and exhaust routes with the fly closed and open. Review mesh coverage, rain protection over vents, closures, and the trade-off among airflow, privacy, and rain resistance. Because condensation depends on weather and user behaviour as well as design, instructions should give practical ventilation guidance rather than absolute anti-condensation claims.
Buyer principle: A fabric test certificate is evidence about a sample of fabric. It is not by itself evidence that a finished tent, with seams, zips, vents, floor joints, and support structure, performs as the brand describes.
6. Treat Instructions, Labels, and Packaging as Product Components
Instructions affect how customers pitch, anchor, ventilate, maintain, and store a tent. Under the EU General Product Safety Regulation, manufacturers must provide clear instructions and safety information in language consumers can easily understand as determined by the Member State of sale, unless the product can be used safely without them. The Regulation also includes product identification and manufacturer contact-information requirements. [5]
Write instructions as an observed task sequence: pack contents, site selection, component identification, layout, assembly order, anchoring and guying, ventilation, care, drying before storage, repair, and safe disassembly. Use diagrams with consistent component names and colours. Test the draft with someone who did not write it using retail-pack contents only. Revise the instruction and product markings where that user pauses or makes a wrong connection.
Warnings should address actual hazards identified for the product. CPSC identifies ASTM F3431-21 as a voluntary standard covering flammability of recreational camping-tent materials and associated warning labels. [1] Do not make “fireproof” or similar claims without defined technical, legal, and marketing substantiation. Ask the supplier which materials and labels were used in the evaluated sample and how any material change will be reviewed.
Specify the carry bag, folding method, pack-in order, moisture protection, accessories pouch, barcode position, master-carton dimensions, gross and net weight field, and pallet configuration. Approve packaging artwork on its physical dieline, not just as a flat graphic. For U.S. imports, current country-of-origin rules generally require an imported article or its container to show the English country name conspicuously, legibly, indelibly, and permanently enough for the ultimate purchaser; the marking must survive normal distribution and store handling. [6] Confirm the right product-versus-packaging application for the final item.
7. Use Samples as Decision Gates
Samples should answer defined questions and link to dated technical-pack revisions. A first development sample may validate silhouette, dimensions, pitch sequence, material hand feel, and component feasibility. A later functional sample may validate seam locations, support interfaces, doors, vents, floor, and packing. A final production-representative sample should use intended materials, construction, branding, labels, instructions, packaging, and accessories to the greatest practical extent. Confirm in writing what is and is not production-representative.
Use a review form with sample ID, technical-pack and BOM revisions, date, evaluator, conditions, measurements, photos, defects, decisions, and required changes. Categorise feedback as must change before next sample, production control point, artwork correction, or approved as presented. This prevents a verbal comment from disappearing between review and production.
For each sample, unpack and count components; pitch only with supplied instructions; measure agreed dimensions; inspect seams, floor, doors, vents, supports, and anchors; repack into the supplied bag; and record observations against the controlled revision. If testing is required, define sample identity and chain of custody. A credible report identifies what was tested, which revision it represents, test conditions, method, result, date, and laboratory.
8. Evaluate Factory Testing and Process Control
Factory testing matters when it connects to the product and the production process. Ask the supplier to trace how material rolls, cut panels, finished tents, and packed cartons are identified and checked. This is more useful than a generic quality presentation.
Request a control plan: what is checked, at which step, by whom, how often, with which equipment, to what acceptance criterion, and what happens when it fails. Tent controls can include incoming fabric identity and shade; print and logo accuracy; cut-panel direction; seam-seal application; pole or beam kit completeness; pitch check; zip operation; label language; pack-in count; carton marking; and final-carton condition.
Ask which tests occur in-house and which are conducted by an independent laboratory. In-house checks can provide fast process feedback; independent testing may be appropriate where customers, standards, marketplaces, or claims require it. Agree methods, sample selection, timing, criteria, and failure response before production. Clarify “100% inspection”: it may mean every tent is visually checked, every tent is pitched, or every carton is scanned. The agreed scope must say exactly what occurs.
A change-control process documents how material, component, construction, artwork, packing, or process changes are reviewed and authorised. Ask who can approve a substitution, what evidence is required, how the buyer is notified, and how the new revision is recorded. A seemingly equivalent material swatch is not an adequate basis for an unapproved substitution.
9. Plan Pre-Shipment Inspection Around User-Relevant Defects
Pre-shipment inspection should check the approved product definition, not an informal idea of “good quality.” Build the checklist from the signed sample, technical pack, BOM, artwork, and packaging specification. Agree defect classes in advance. A critical defect may create a safety or legal nonconformity. A major defect materially reduces function, usability, or saleability. A minor defect is a smaller deviation that does not materially affect these outcomes. Set project-specific thresholds rather than copying another product line.
Attribute sampling can be structured with ISO 2859-1, which specifies lot-by-lot inspection procedures by attributes indexed by an acceptance quality limit (AQL). [7] An AQL plan is not a guarantee that every unit is flawless, and it does not replace controls for critical requirements. Agree the lot definition, inspection level, sample size, defect classifications, acceptance and rejection numbers, reinspection route, and any 100% checks before packing.
| Inspection area | Example verification | Why it matters |
|---|---|---|
| Identity and finish | Model, colour, logo, materials, accessories match approved documents | Prevents wrong variants, missing parts, and misleading presentation |
| Pitch and function | Selected tents can be pitched; supports, zips, doors, vents, and guylines function | Finds assembly and usability failures before dispatch |
| Seams and floor | Check seal continuity, missed stitching, floor joins, corners, and anchors | Targets likely weather-entry and durability interfaces |
| Labels and pack-out | Confirm revisions, languages, warnings, origin marking, component count, carton condition | Supports safe use, retail execution, and traceability |
For a practical inspection, select cartons under the agreed sampling plan, verify marks and quantities, compare opened units against the approved documents, check pack-in components, and pitch the defined subset. The report should state lot size, method, sample count, defect categories, photographs, corrective actions, and disposition. If an AQL plan is used, report the selected plan rather than merely saying “passed.”
For palletised U.S. shipments, decide on wood packaging early. USDA APHIS states that regulated wood packaging material used to support, protect, or carry cargo into the United States must be treated and certified under ISPM 15. It also lists alternatives such as plywood, plastic pallets, and metal frames as outside its wood-packaging regulation. [8] Confirm destination-specific requirements with freight and customs specialists.
10. Select Suppliers With an Evidence-Based Scorecard
Evaluate suppliers against the same evidence, whether the review is a visit, video audit, questionnaire, or sample project. A clear scorecard can include technical fit, material transparency, sample quality, testing capability, process control, change management, packaging competence, documentation, communication, and commercial fit. Weight the categories for the project: an expedition tent may place more weight on engineering and repairability, while a retail shelter may emphasise packaging control and repeatability.
Keep a separate open-risk log. A strong score should not erase unresolved risks around instructions, traceability, fire-related messaging, material substitutions, or a critical structural interface. Ask for redacted process examples rather than other customers’ confidential product information: a comparable control plan, a material-change approval flow, or the document sequence from sample revision to production release.
Before a purchase order, align the production-release package: final technical-pack revision, BOM, approved-sample ID, labels and artwork, packaging specification, user instructions, required test plan, defect criteria, inspection plan, change-control contacts, shipment marks, and document list. This becomes the common baseline for production and makes unapproved variation easier to identify.
11. Frequently Asked Questions
What should I send a camping tent supplier in my first enquiry?
Send intended user, destination markets, tent type and capacity, use conditions, key dimensions, claims, branding, packaging needs, and expected documents. State what is fixed and what you want the supplier to propose.
Is a fabric water-resistance result enough for a waterproof tent claim?
No. It is evidence about tested fabric under a stated method. Assess seams, floor, zips, vents, geometry, and instructions, then agree claim wording and evidence.
Should we choose poles or air beams?
Choose the system that fits architecture, expected conditions, setup expectation, packed-size objective, repair strategy, and test plan. Compare the complete load path and instructions.
Which seams should be sealed?
It depends on material, coating, construction, and exposure. Request a seam map identifying weather-exposed and structural seams, sealing method, construction specification, and finished-product check.
Do private-label colour changes need separate testing?
Not always. Material, dye, coating, component, construction, or artwork changes can affect properties and claims; define retest triggers in change control.
How should we inspect tents before shipment?
Use a plan tied to the approved technical pack and sample. Check identity, pack-in, labels, seams, floor, zips, supports, pitch function, packaging, cartons, and shipment marks; document sampling and disposition.
Related CampLume resources
Use these related pages to turn How Do You Choose a Camping Tent Supplier for Private Label Projects? into a more complete, supplier-ready decision:
- Read: How to Audit a Camping Gear Supplier Before Placing Your First Order for the next connected sourcing decision.
- Explore CampLume tents and shelter options to compare a suitable CampLume product platform.
- See the CampLume buyer FAQ for concise guidance on samples, MOQ, quality control, compliance and shipment preparation.
Conclusion: Choose Evidence, Not Assurances
The right camping tent supplier helps turn an intended-use promise into a controlled product definition, then shows how that definition will be made, tested, packed, and inspected. Start with a precise brief and finish with a documented production-release package—not a catalogue image or an unsupported performance statement.
Ask for evidence on fabric and coatings, poles or air beams, seams and floors, user instructions, labels, packaging, samples, test scope, process controls, and shipment inspection. Where an answer is not yet available, record it as an open item with an owner and evidence source. This approach reduces avoidable redesign, protects retail presentation, and creates a stronger basis for customer-facing claims.
For a project-specific private-label tent review, email info@camplume.com with your intended market, product concept, and specification priorities.
Project discussion
Need to apply this guide to a product programme?
Send your product category, target market, estimated quantity, current specification and packaging stage. CampLume will continue the discussion by email.
Email info@camplume.comSources and further reading
References
- 1Tents
- 2Textile Label
- 3ISO 5912:2020 Camping tents — Requirements and test methods
- 4Threading Your Way Through the Labeling Requirements Under the Textile and Wool Acts
- 5Regulation (EU) 2023/988 on general product safety
- 619 CFR Part 134 — Country of Origin Marking
- 7ISO 2859-1:1999 Sampling procedures for inspection by attributes — Part 1
- 8Wood Packaging Material